
The first place to start the application for DAS is from OPTIONS!
Step-by-step guide
- After entering information under "Switchboard" go to Options. Under DAS select what type. This example will select SM@RT DAS (WL/VL)


2. At this point if you want just a Main you are good to go. If you want Mains and Branches click on the DAS Devices drop down and click on Reset.

3. After Reset, click on Mains and Branches. Now you have established the type of DAS Required. Remember this is the first step.

4. Let's take a look at the configuration and View. You see the Main, Aux Compartment and a Branch. The Com Meter is for the coordination between the Main and Branches.
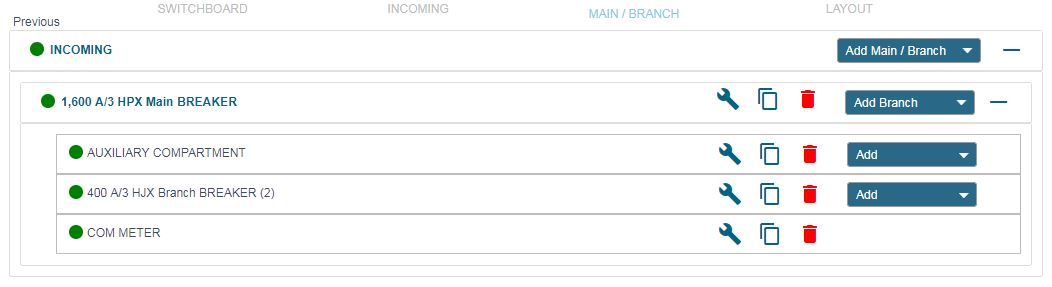
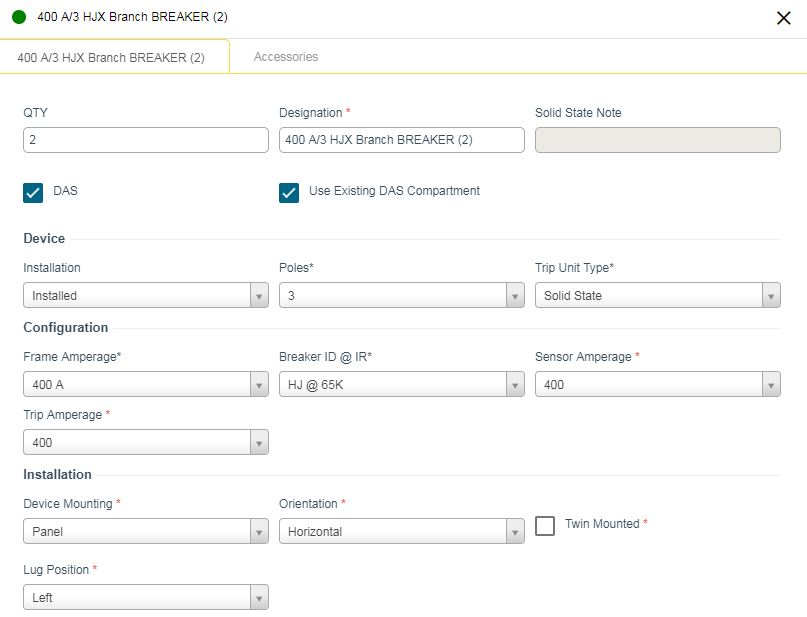
5. Let's look at the Breach configuration. The DAS for Branch is selected and the "Use Existing DAS Compartment" is checked. Why? Because the Aux Compartment was created for the main and has room for other components. Note: A Smart DAS Aux Compartment can have up to 8 DAS breaker components.
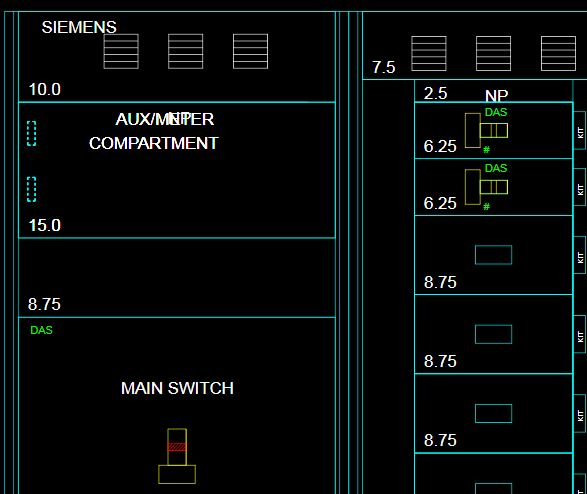
6. Switchboard View showing DAS breakers.
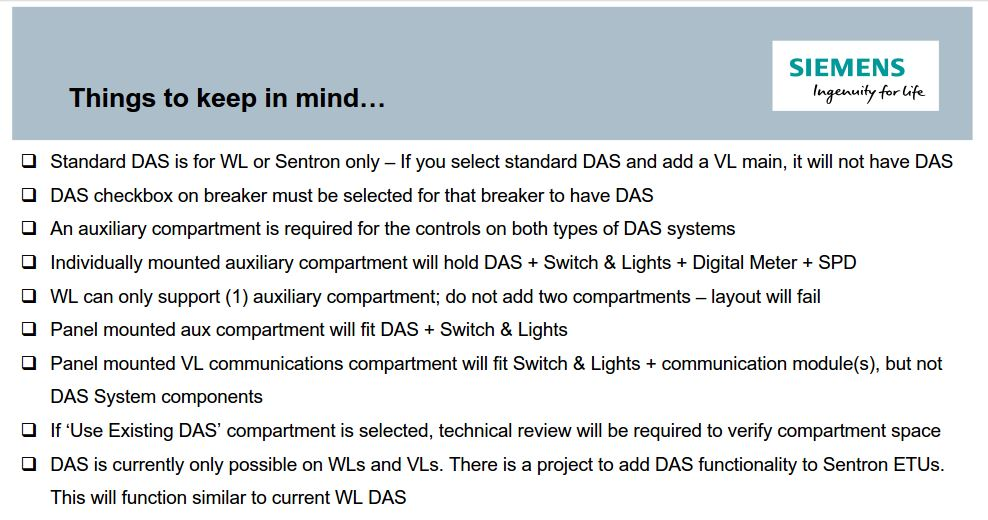
7. Things to keep in mind.....
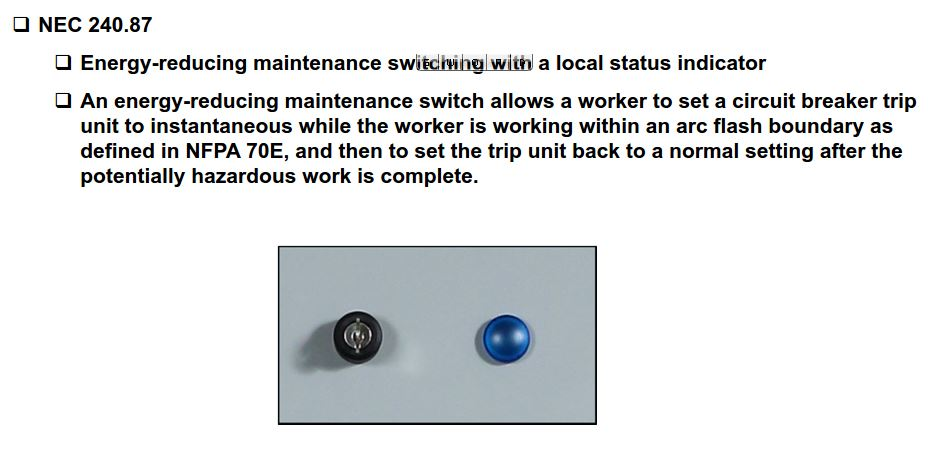
8. DAS Switch and Indication light.
![]()
| Version : Released | Article ID: SKA-19-0347 | © Siemens AG 2019 | Owner: | Author: | Released Date: July 04, 2019 | Category: |
|---|
