To change the incoming position from left to right OR right to left follow below steps
Step-by-step guide
- Open the switchboard configuration
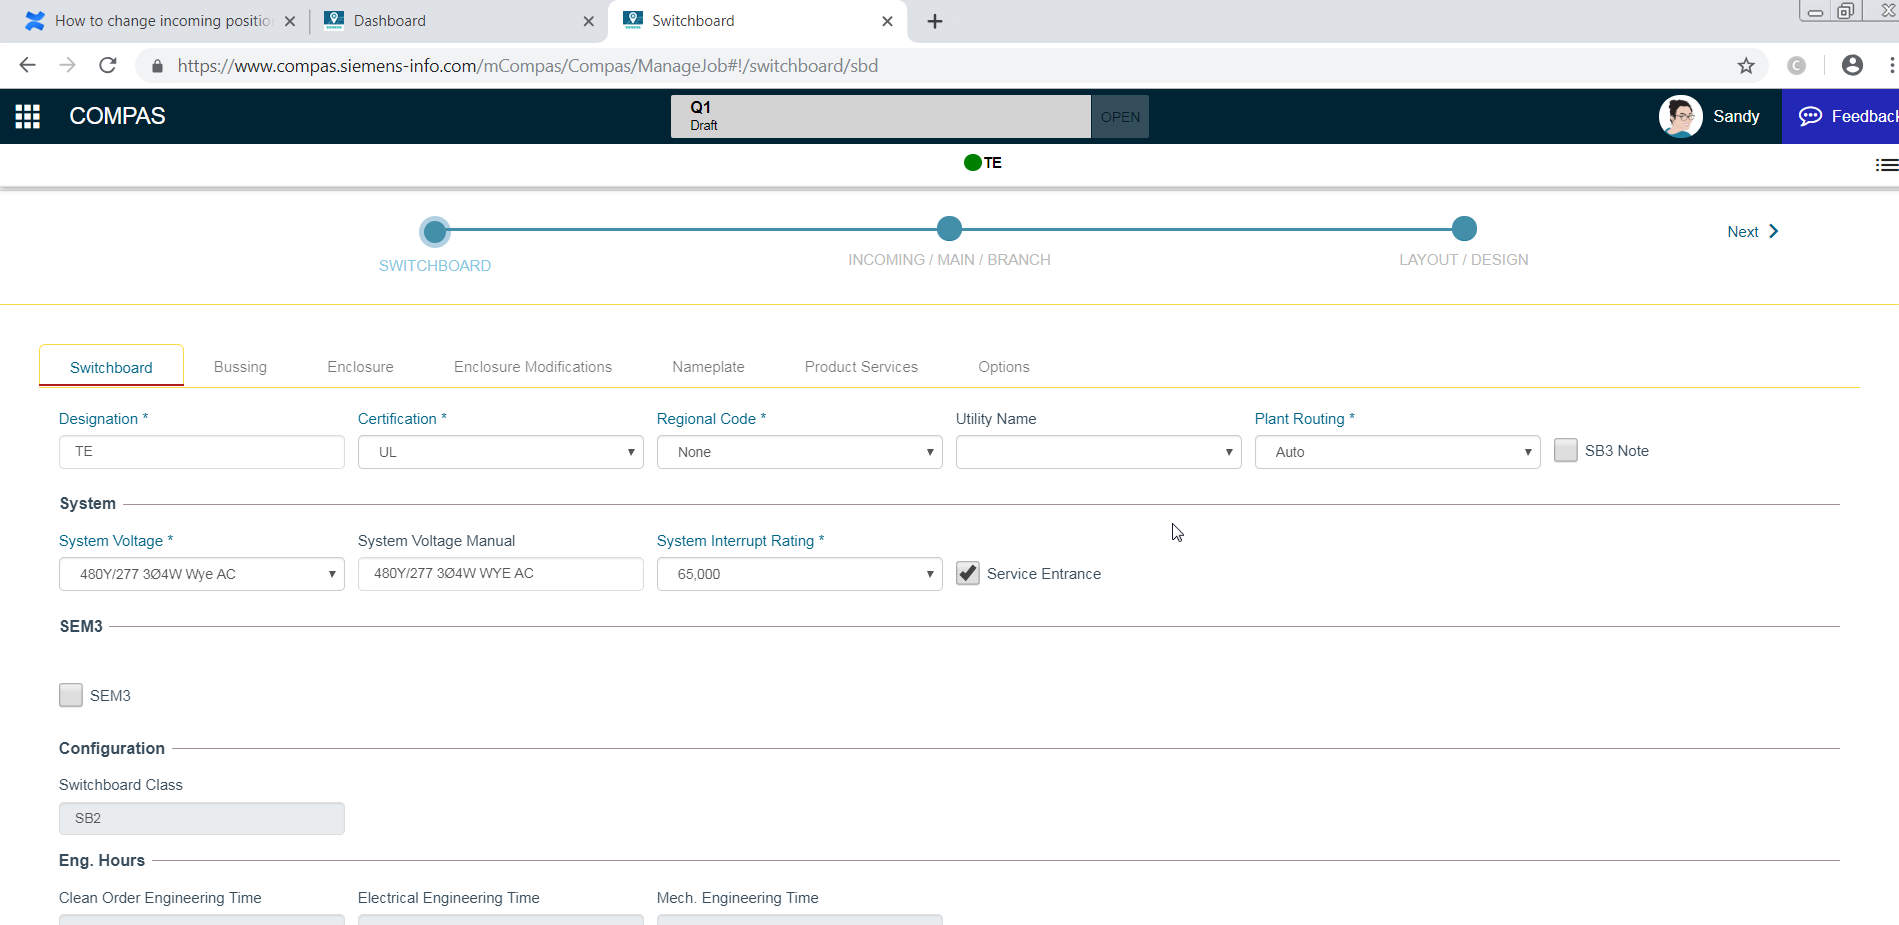
- Go to Layout/Design tab
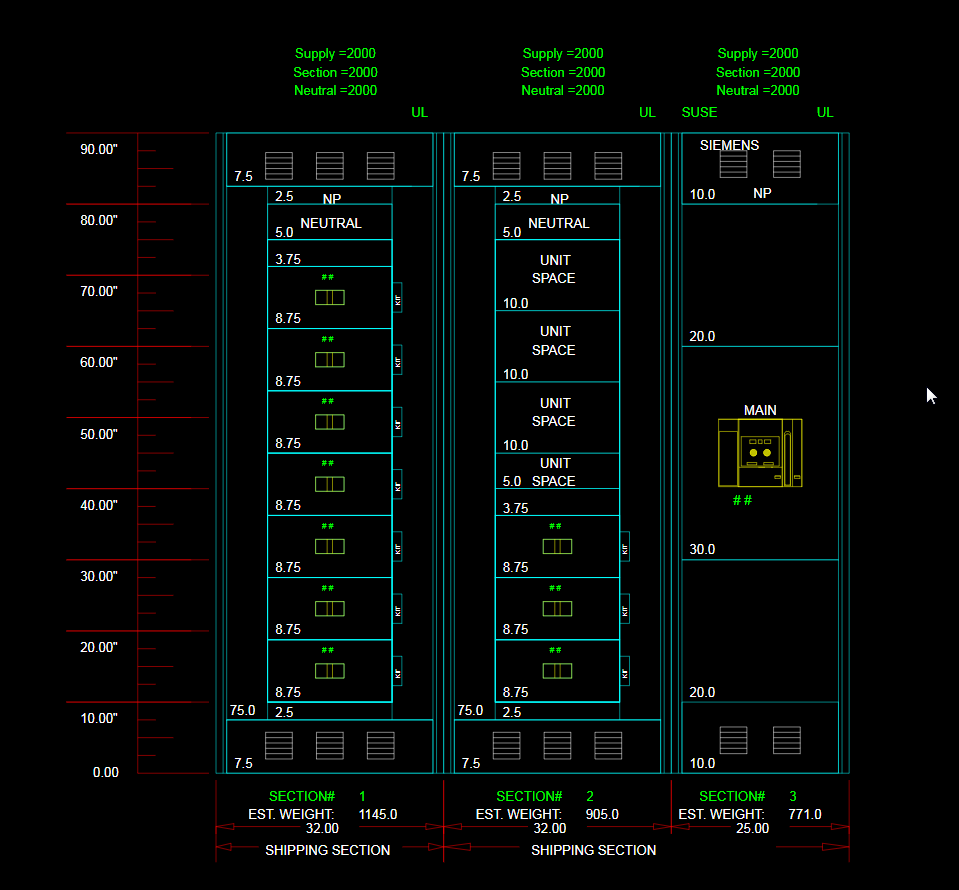
- Take the snap shot of the layout
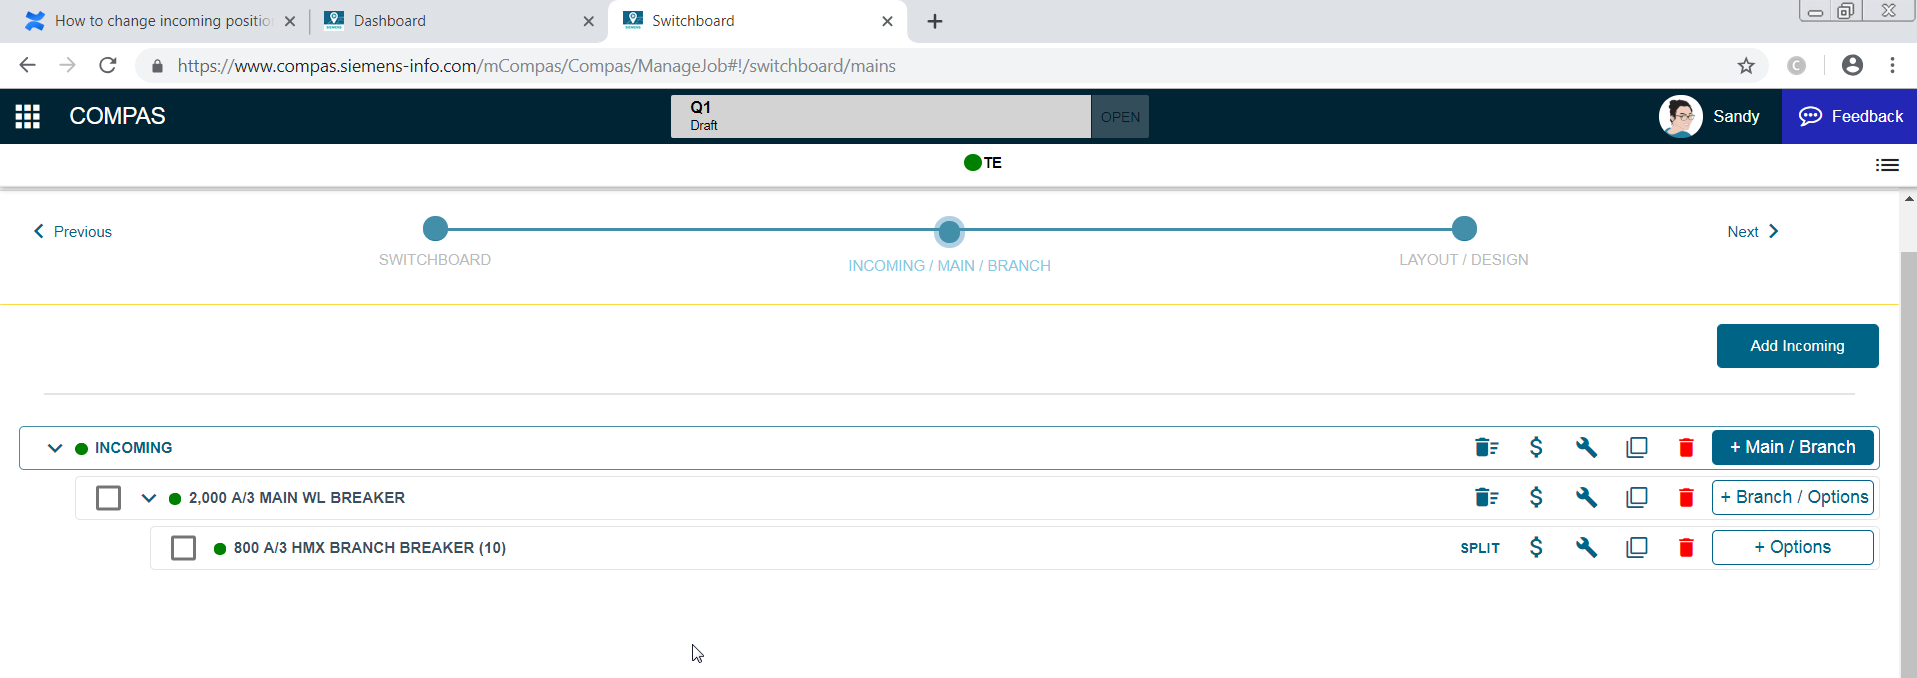
- Go to main configuration page by selection Incoming/Main/Branch tab
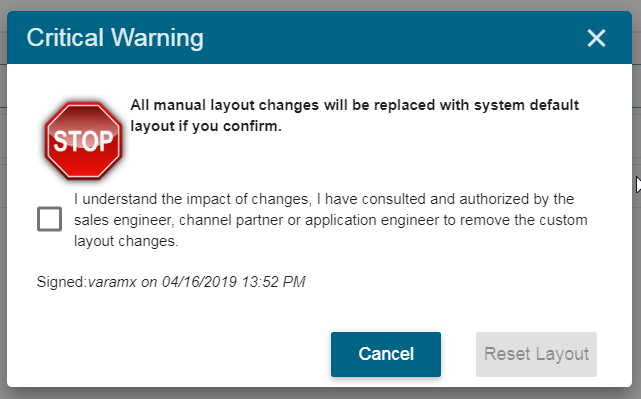
- Delete layout by selecting
 icon (This step will remove any manual changes you made in physical location of sections and devices different from the system default)
 - Acknowledge the warning message about the loss of manual arrangements. Take a snap shot of the current arrangement so that you can verify with the new layout
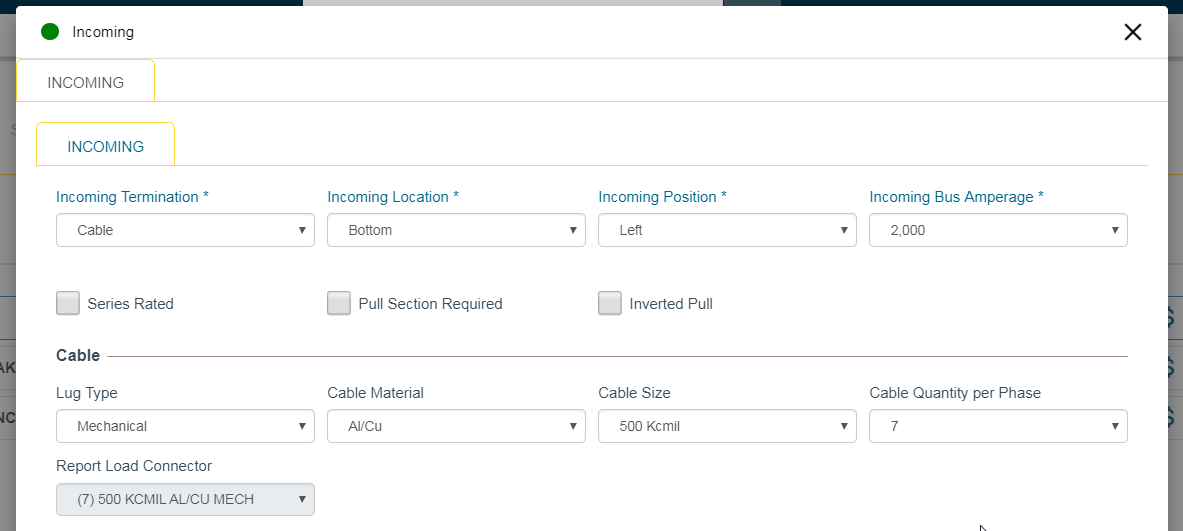
- Open incoming configuration page by selecting wrench icon
- Change the position from left to right or right to left and close the dialog
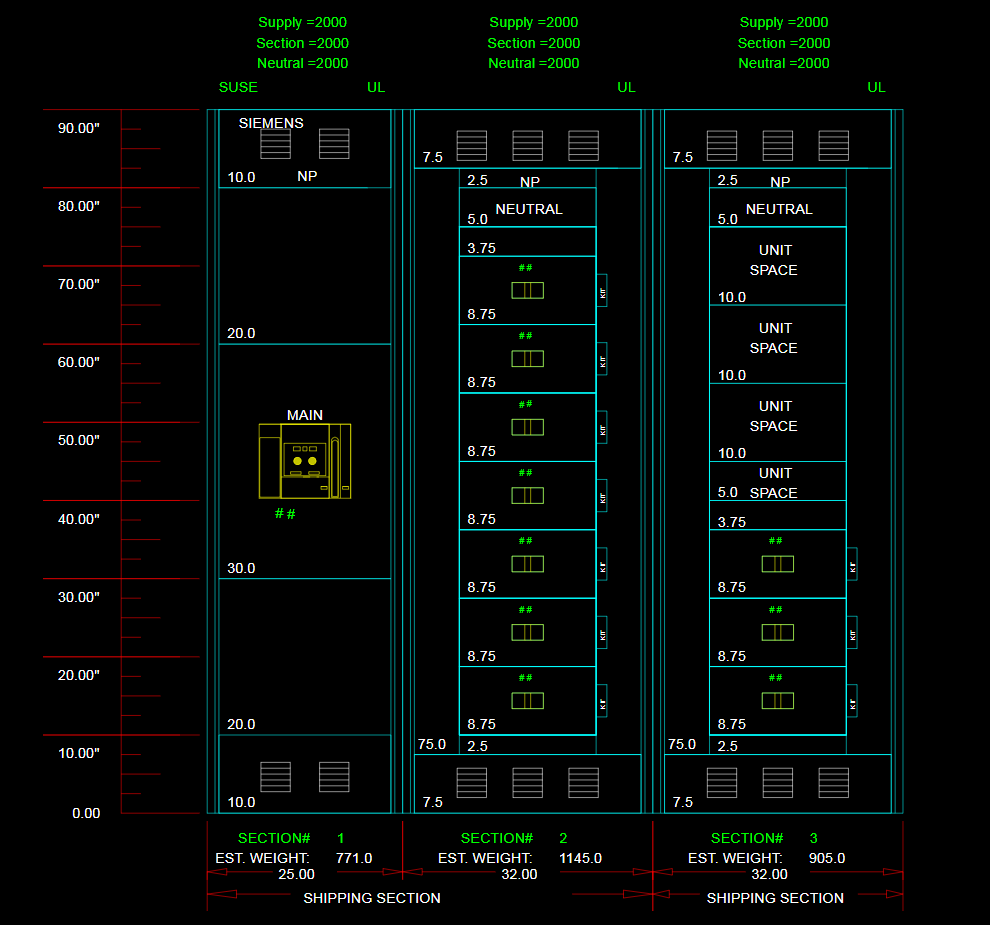
- Go to Layout/Design page to view the your changes